Hello and welcome to mestc user guide. In this file you’ll find how to setup, use and
customize your brand-new WordPress THeme. I hope this documentation will help you to
build your next amazing website smoothly.
If you have any questions or issues with the item, you can always reach me through
my user profile page on ThemeForest
or just write me directly to my e-mail
infodsngrid@gmail.com
Please don’t forget to
mention your purchase code in your support request.
WordPress Setup
To install this theme you must have a working version of WordPress already installed. If you
need help installing WordPress, please follow the instructions in
WordPress Codex
.
If you are a very new to WordPress world, I recommend you to check some useful resources on
how setup and use WordPress:
WordPress Codex
– general information related to WordPress installation on your server.
After you’ve made a purchase on Themeforest, you’ll need to download theme files from your
Themeforest Account. To do this, simply navigate to Downloads tab and find
purchased item
mestc - Creative Ajax Portfolio WordPress Theme
You can choose to download everything or just a WordPress theme .zip archive. The difference
        is explained below.
All Files & Documentation
In the package you will find:
Below is the folder structure and needs to be uploaded to your website root directory:
📄 mestc.zip - main theme file. You can install it through WordPress admin
panel. If you install it via FTP then unzip it first and use the extracted folder.
📄 mestc-child.zip - child theme. For advanced users who are about to make code
changes.
📁 Demo Content – folder that contains all the demo data. Demo is really
helpful to get you familiar with all the theme features and possibilities. Setting up
demo data is covered in this user guide.
📁 Documentation - folder with the user guide.
Installable WordPress file only
mestc.zip – main theme file. You can install it through WordPress admin panel.
If you install it via FTP then unzip it first and use the extracted folder.
Installation
There are 2 ways on how you can install WordPress themes – using WordPress admin panel or
using FTP upload. The first method is probably the simplest installation method for the most
of users. Let’s figure it out
Installing via WordPress Panel
Follow the steps below to install theme through WordPress admin panel:
Step 1.
Navigate to Appearance → Themes and click Add New
Step 2.
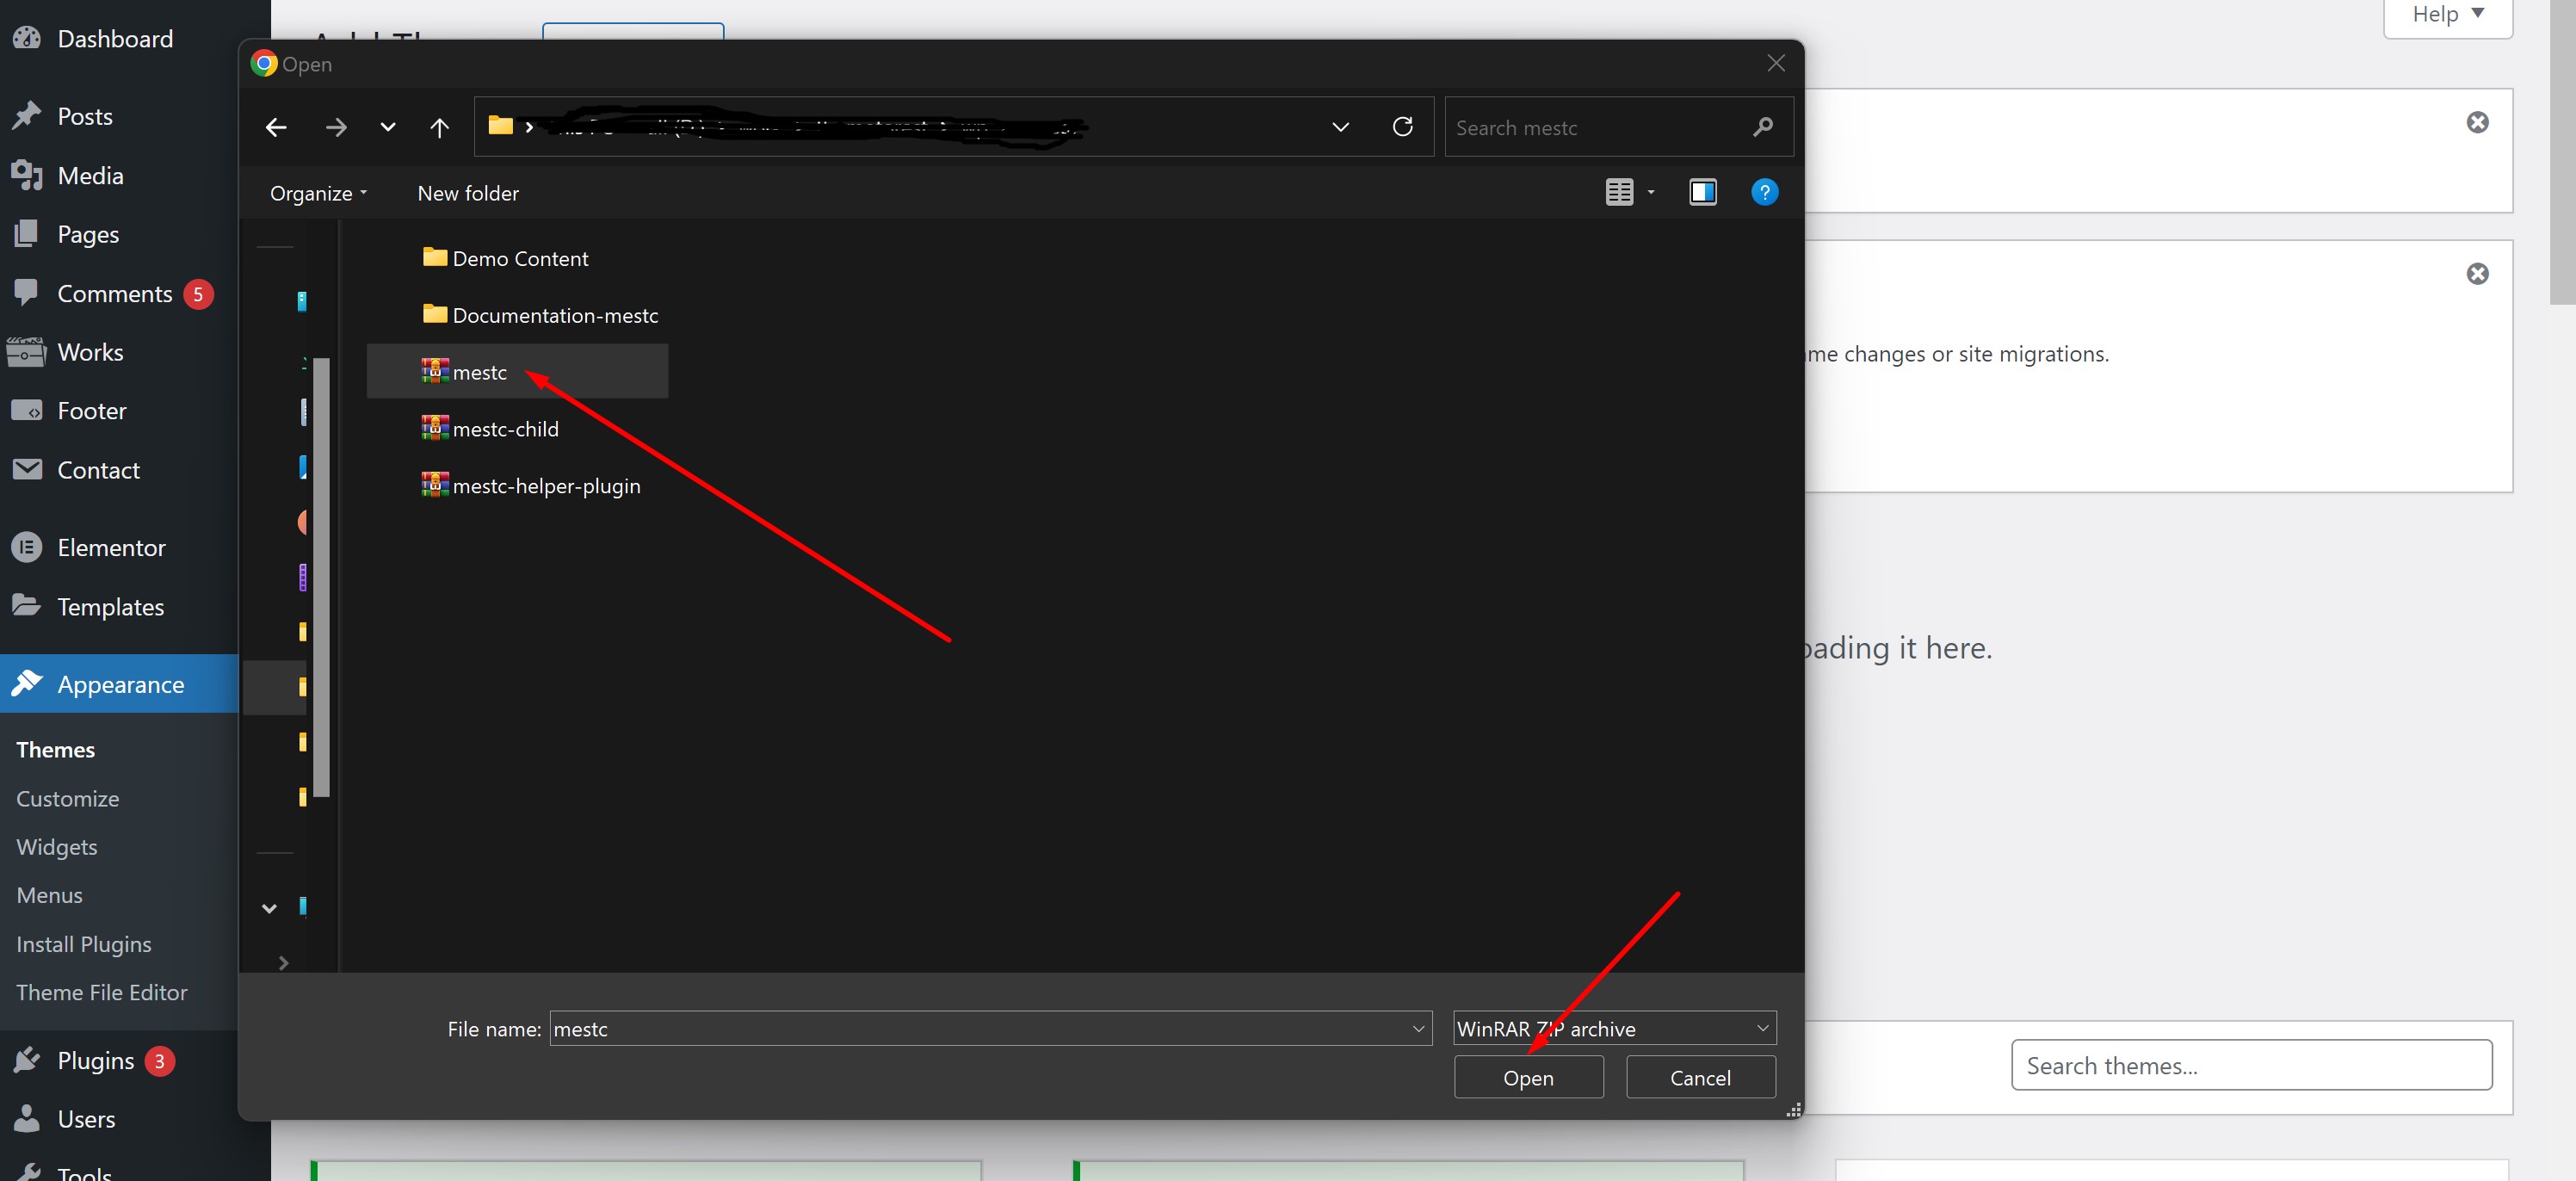
Click Upload Theme
Step 3.
Select your downloaded theme file mestc.zip
( Installing & Update ) via FTP Upload
If you would like to install the theme via FTP, follow the next steps:
Step 1.
Extract mestc.zipfile that you’ve downloaded previously. You should get a folder
named📁 mestcwith the following files and folders.
Step 2.
Using FTP Client, navigate to 📁 wp-content/themes/ folder under your WordPress website’s root directory.
Step 3.
Upload the folder you’ve extracted on the first step into 📁 wp-content/themes/
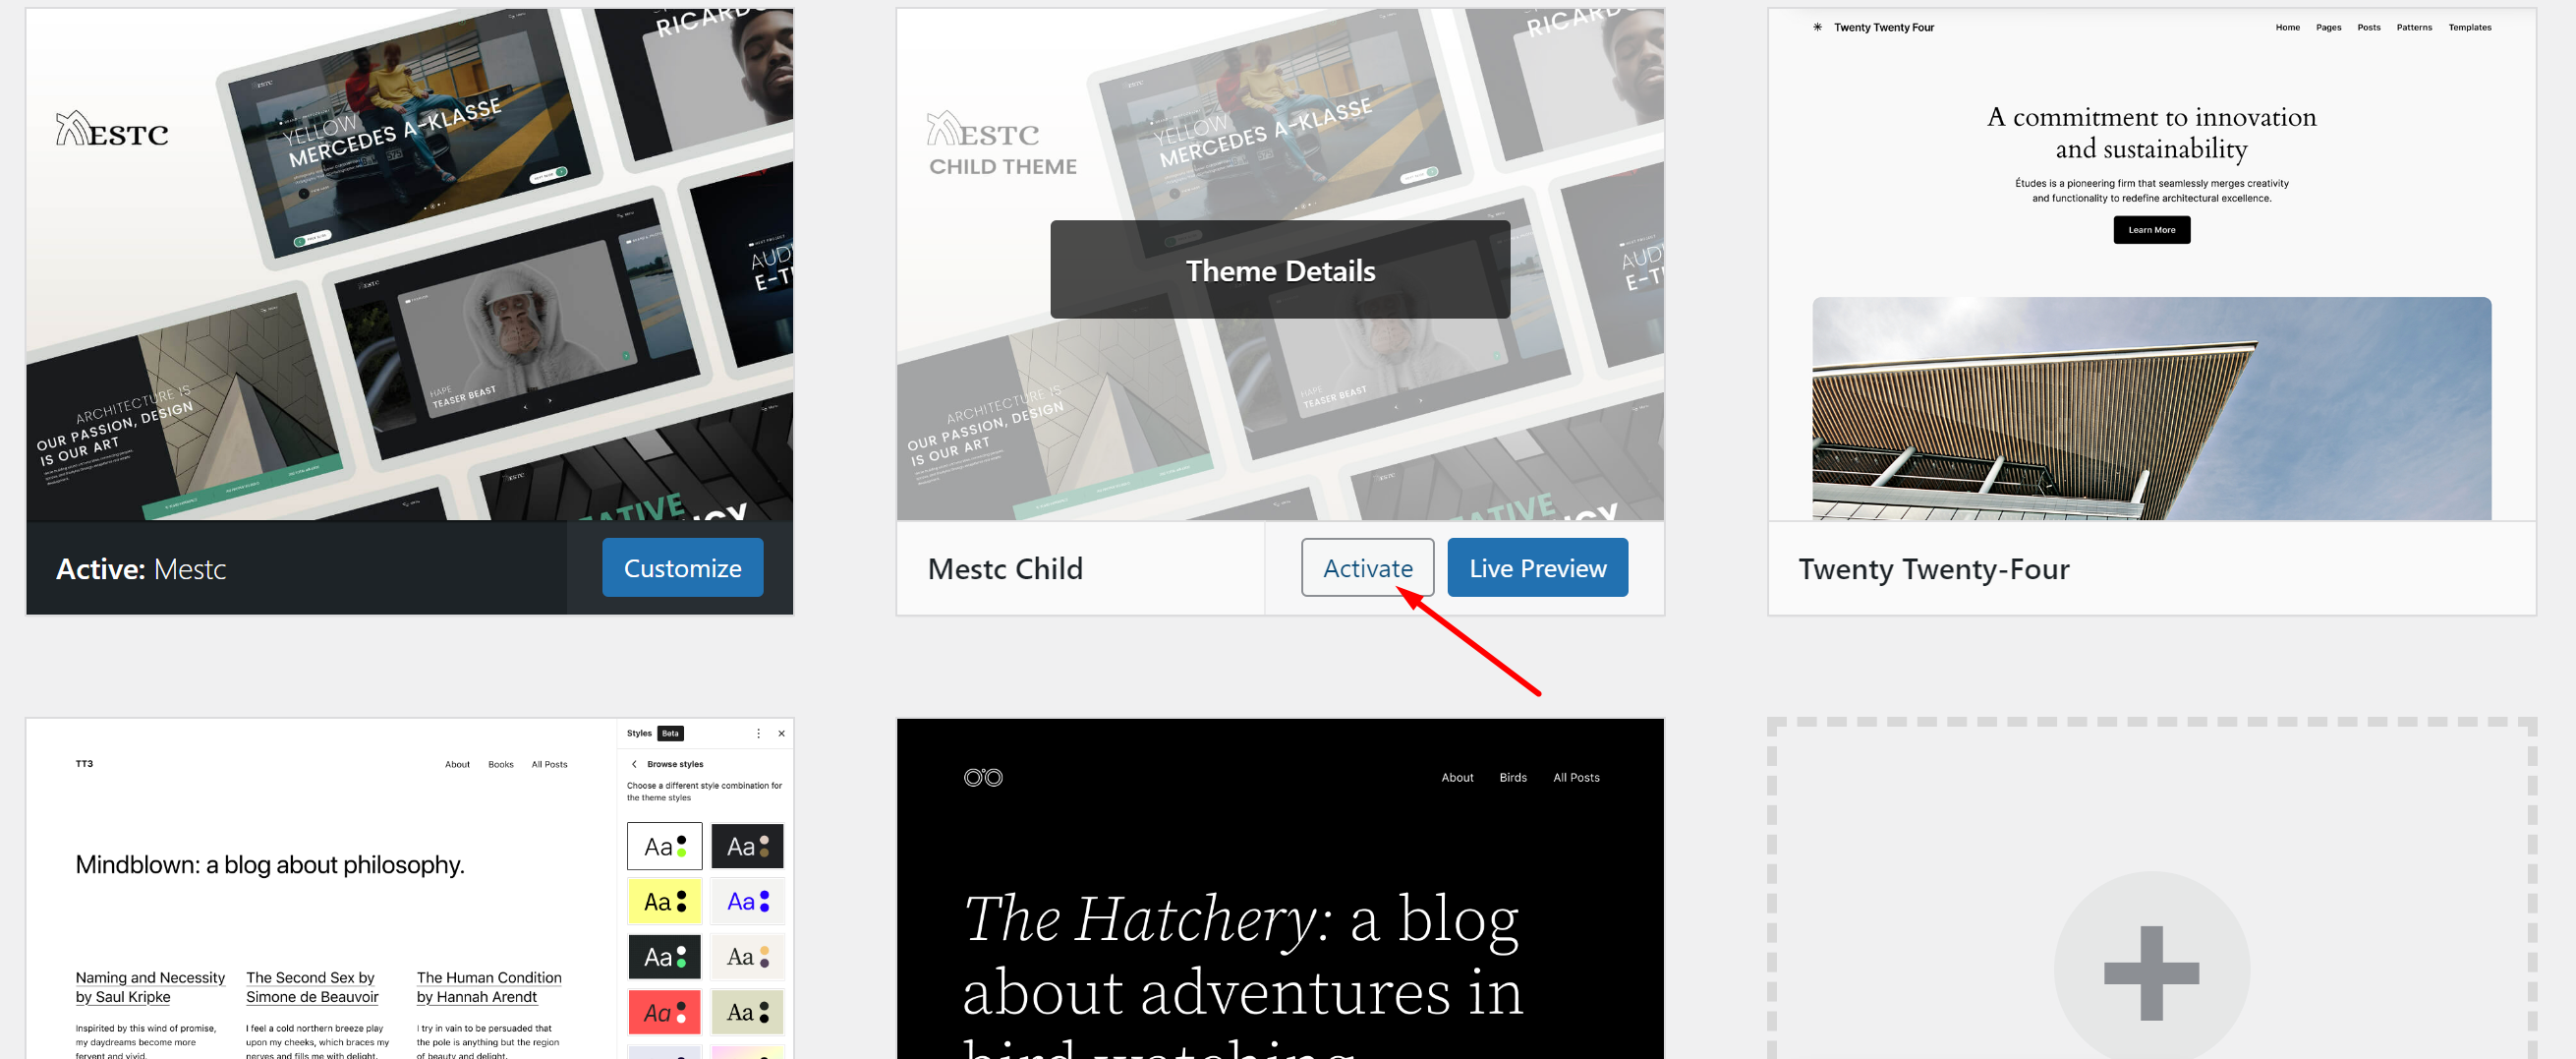
Theme Activation
Once the installation is complete, your brand new theme is ready to use. Let’s activate it. To do
so, go to
📁 Appearance → Themes
Locate mestc theme cover and clickActivatebutton beneath it
Theme Setup
One demo import
After the first theme activation, you should see a simple wizard that will help you with the
initial theme setup. Just follow all the steps by clicking Next button. After going
through all the steps, you will be ready to use your brand new website.
You will be promted to install child theme, required plugins and import the demo
data
If you’ve dismissed the wizard after the theme activation – you can still access it
in Appearance -> Theme Setup
If you don’t see this wizard or you have any issues with it, don’t worry. We will go though the
classic manual installation and demo import using
One Click Demo Import
in the next articles.
Demo import fails or takes too long?
90% of problems with demo import are due to low PHP configuration limits on your server
hosting. To check your current PHP environment
Plugins Installation & Activation
If installation was successful, you'll see a notice about required plugins for mestc, to proceed click "Begin installing plugins".
This theme requires the following plugins...
Importing Demo Content
If you want to have the same content on your website as Live Preview of Canela theme, you'll need to import demo content.
TIP
No existing posts, pages, categories, images, custom post types or any other data
will be deleted or modified.
Posts, pages, images, widgets, menus, and other theme settings will get imported.
Make sure you have the set of files in the📁Demo Content folder as follows:
Demo import fails or takes too long?
90% of problems with demo import are due to low PHP configuration limits on your server
hosting. To check your current PHP environment
Adjust the home page
Go to Settings → Reading, and select the front page you wish to have for your website.
After you are done, don’t forget to Save Changes
Navigation Menu
setup navigation menu, from admin panel go toAppearance → Menu
Give Your Menu Name & Create Menu
Those checkboxes won’t add all your posts immediately to the menu. They
just enable the convenient links control for your posts.
Elementor
Elementor Setup
Go to Elementor → Settings menu
General Options
Post Types – Posts, Pages, Works
Disable Default Colors – Yes
Disable Default Fonts – Yes
Theme Updates
Update via WordPress Panel
Step 1.
Navigate to Appearance → Themes and click Add New
Step 2.
Click Upload Theme
Step 3.
Select your downloaded theme file mestc.zip
Step 4.
Select Replace current with uploaded
( Installing & Update ) via FTP Upload
If you would like to install the theme via FTP, follow the next steps:
Step 1.
Extract mestc.zipfile that you’ve downloaded previously. You should get a folder
named📁 mestcwith the following files and folders.
Step 2.
Using FTP Client, navigate to 📁 wp-content/themes/ folder under your WordPress website’s root directory.
Step 3.
Upload the folder you’ve extracted on the first step into 📁 wp-content/themes/
Customization
Getting Started
All the global theme options can be configured in Customizer (WordPress admin dashboard -> Appearance -> Customize). The options are grouped in several sections, outlined below.
Portfolio custom slug
if you want your portfolio post type to have a custom slug in the url.
Page Preloader
Enable preloader mask while the page is loading.
Effect Cursor
Uploading Site Logo
To upload your logo, go to Customizer → Header → Logo You are free to use the
tandard text logo version (with or without tagline) or upload your own brand image.
AJAX Transitions
When navigate loads the target content without reloading the current page.
Smooth Scrolling
mestc has built-in smooth scrolling page feature. It replaces native browser’s scrolling with
transforms-based scrolling. As a result – other page transforms, like parallax effect, run
smoother as well.
IMPORTANT!
The downside of smooth scrolling is it can affect user experience and may work slow on
old hardware PC. If you’re experiencing such problems, I suggest you to turn smooth
scrolling off. You can do it in Customizer → Theme Options → Smooth Scroll
Using Child Theme
A child theme allows you to change small aspects of your site’s appearance yet still preserve
your theme’s look and functionality.
What is a Parent Theme?
A parent theme is a complete theme which includes all of the required WordPress template files
and assets for the theme to work. All themes – excluding child themes – are considered parent
themes. For example, in your download package 📄mestc.zip is a parent mestc theme.
What is a Child Theme?
A child theme inherits the look and feel of the parent theme and all of its functions, but can be
used to make modifications to any part of the theme. In this way, customizations are kept
separate from the parent theme’s files. Using a child theme lets you upgrade the parent theme
without affecting the customizations you’ve made to your site.
How can Child Themes be useful?
Child themes:
make your modifications portable and replicable;
keep customization separate from parent theme functions;
allow parent themes to be updated without destroying your modifications;
allow you to take advantage of the effort and testing put into parent theme;
save on development time since you are not recreating the wheel; and
are a great way to start learning about theme development.
Warning
Child theme customizations are recommended only for advanced WordPress users. When
customizing a child theme please make you’re 100% sure what you’re doing, otherwise your
website may malfunction or even crash.
Setup Child Theme
If you went though the Wizard Theme Setup you’re likely to already have
the child theme installed and activated. If you skipped child theme installation, just get a
file 📄mestc-child.zip from your download package and install it as a normal
WordPress theme.
mestc Child Theme is installed and activated
Customizing PHP Files
To modify a.php file in the theme, simply copy that file from wp-content/themes/mestc/
directory and paste it to wp-content/themes/mestc-child/ respecting the full path
and file name. WordPress will look for the required file in child theme directory first and will
use it if it exists. If it doesn't - it will try to look at parent theme directory.
Example 1. Overriding header template
Copy file 📄wp-content/themes/mestc/header.php and paste it to 📄wp-content/themes/mestc-child/header.php
Create a new directory structure in child theme wp-content/themes/mestc-child/template-parts/preloader
Paste copied file to wp-content/themes/mestc-child/template-parts/preloader/preloader.php
Edit 📄preloader.php file in the child theme.
Customizing JavaScript Files
Unlike working with .php files you can't simply override .js files by
copying them from parent theme to child theme at the same path. JavaScript files require
different workflow since WordPress doesn't look for them in the theme directories.
Here is the plan:
Copy/paste .js file you want to override in the same way you've been working
with .php files
Locate the script identifier you want to unload in 📄wp-content/themes/mestc/inc/functions/frontend.php
Unload the selected parent theme script ID
Load custom script from child theme under the same ID
Theme Translation
Your brand-new theme is fully translatable to other languages. For convenient translation I
recommend to install
Loco Translate plugin. It’s
available for free and allows your to translate your theme right from admin panel.
Warning
Before you do any translating, make sure the folder 📁wp-content/languages/loco/themes
exists on your site, and is writeable by the web server.
If you have WordPress automatic updates enabled then the 📁wp-content/languages
folder probably exists already. The 📁/loco subfolder is there to protect your
custom translations from automatic translation updates. This is critical if you want to avoid
your files being deleted behind your back.
Translation Dashboard
If you haven't installed and enabled Loco
Translate plugin yet, do that now.
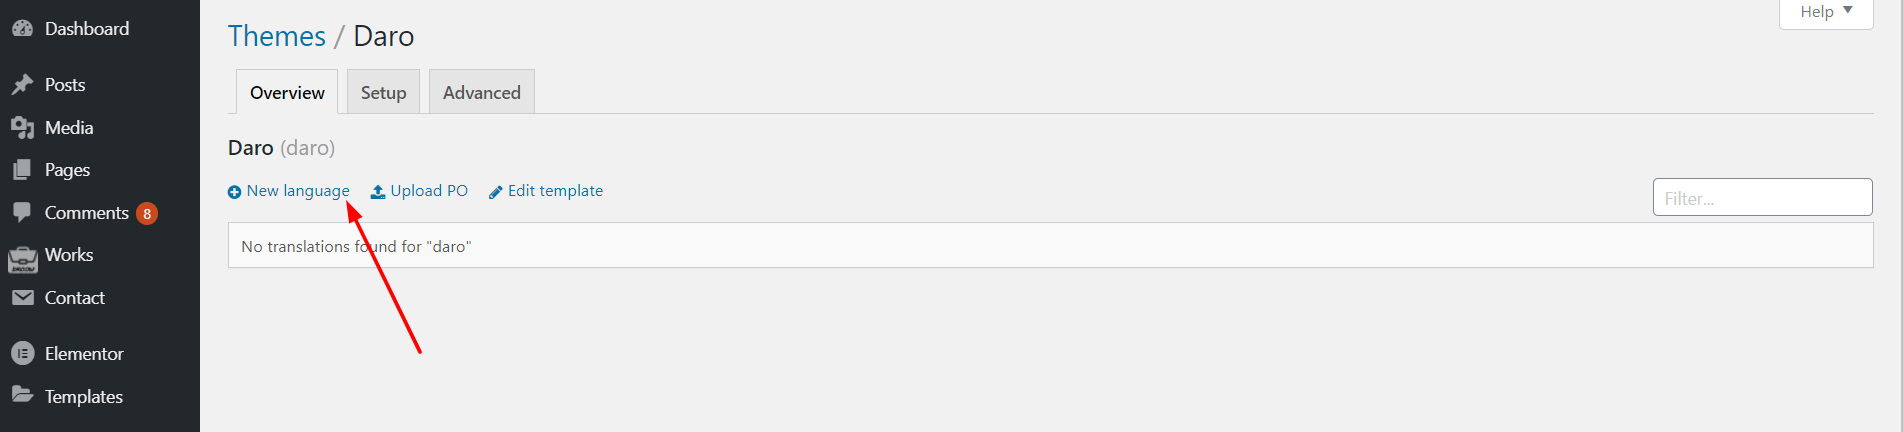
From admin panel go to Loco Translate → Themes menu. This will take you to a list of
all available themes in your WordPress. You should see Daro in that list. Click it and you
should see the following screen:
Above the language list (which may be empty) you should see a link that
saysNew language with an add icon
Add a New Language
To start translating the theme into another language click New language and you'll
be taken to a new screen where you can choose the language you want.
Select a language from the dropdown list of common languages. In this example I will select
French You could achieve the same result by entering ru into the text
field instead.
If you've set up your folders correctly you should see a location marked as Custom
You should select this so your new translations are safe from automatic
updates
Once on the editor screen you'll see all the strings the theme has defined in its template file.
Untranslated strings are shown in bold blue. To start with they will all be untranslated.
Translate your strings and click Save button once you've
done


 Give Your Menu Name & Create Menu